Direct3D is a COM interface programming for Windows that
uses Direct 3D Retained mode - or D3DRM. Some impressive examples of 3D
graphics in RapidQ can be found at https://rapidq.phatcode.net/direct3d/.
Direct 3D retained mode ( D3DRM) was stopped with DirectX. You must download
the d3drm.dll to
use RapidQ 3D under Windows Vista. Although not as powerful as DirectX
Immediate mode, RapidQ 3D is much easier to program.
13.1 Requirement specifications
Just the runtime files, you don't need the SDK, but if you want, no one is stopping you from downloading it. The SDK does contain an important file CONV3DS.EXE which is necessary to convert different 3D models for use with your programs. However, I have posted a link to this file so it's not necessary for you download the entire SDK just for that one file.
Other nice things to have:
- 3D accelerated video card
- A 3D modeler (like 3D Studio)
- OpenGL (some 3D modelers use this)
Nice links to have:
OpenFX a free 3D
modeler available
www.delgine.com deled 3d tool
for creating .x models and files.
Anim8or
homepage good 3D modeler
DOGA Homepage another good
free 3D modeler
CONV3DS.EXE converts
.3DS files to .X files
3DCafe.com
thousands of free 3D models available
Microsoft's DirectX homepage
learn more, download their SDK
documentation
http://www.3dengines.net/ for Potential 3-D engines
or
http://cg.cs.tu-berlin.de/~ki/engines.html
http://www.basic4gl.net/
Basic4GL by Tom Mulgrew, basic development for open GL.
http://www.blitzbasic.com/
Blitz Basic(impressive and simple!)
http://darkbasic.thegamecreators.com/
13.2 Using Anim8or to create 3D models
- Step by step introduction
- Load Anim8or
- Click on a polygon object

- To draw this object, just click and drag your mouse on the main
grid

- Make sure to also center the object (not necessary but a good thing anyway). To do this, just select the object you want centered, then select from the menu: Edit|Locate|Center about origin
- Make sure you haven't drawn an overly big polygon, perhaps the size of your pinky is good enough.
- Now to export your object, select from the menu: Object|Export Just make sure to save as a .3DS file.
- Let's just say you named your file poly.3ds then from the command
prompt type in:
CONV3DS -m poly.3ds
I assumed you downloaded CONV3DS.EXE (copy this to your Windows directory if you want). - Once converted, you should have a poly.x file, this object file can now be used in your Rapid-Q program!
13.3 Loading/Using .X Files
' Simply places an object on the scene

$TYPECHECK ON

CONST alClient = 5

'-- Light Types
CONST D3DRMLIGHT_AMBIENT = 0
CONST D3DRMLIGHT_POINT = 1
CONST D3DRMLIGHT_SPOT = 2
CONST D3DRMLIGHT_DIRECTIONAL = 3
CONST D3DRMLIGHT_PARALLELPOINT = 4

DECLARE SUB DXInitialize(Sender AS QDXScreen)
DECLARE SUB DXTimerExpired

DIM DXTimer AS QDXTimer
    DXTimer.Enabled = 1
    DXTimer.Interval = 0
    DXTimer.Activeonly = 0
    DXTimer.OnTimer = DXTimerExpired

CREATE Form AS QForm
    Caption = "Direct 3D Example"
    Center
    CREATE DXScreen AS QDXScreen
        Init(320,240)
        Align = alClient
        Use3D = 1
        UseHardware = 0        '' This is for non-3D accelerated video cards.
                               '' 3D will be emulated using software, which
                               '' is much slower.
        OnInitialize = DXInitialize
    END CREATE
    ShowModal
END CREATE


SUB DXInitialize(Sender AS QDXScreen)
   DIM Light AS QD3DLight
   DIM LightFrame AS QD3DFrame, MeshFrame AS QD3DFrame
   DIM MeshBuilder AS QD3DMeshBuilder

   DXScreen.CreateFrame(LightFrame)
   DXScreen.CreateFrame(MeshFrame)

   '-- Need light, else object would be completely hidden
   DXScreen.CreateLightRGB(D3DRMLIGHT_DIRECTIONAL, 0.9, 0.9, 0.9, Light)
   LightFrame.AddLight(Light)

   DXScreen.SetCameraPosition(-5, 10, 0)
   DXScreen.SetCameraOrientation(0.35, -0.65, 1.0, -0.15, 1.0, 0.5)

   MeshFrame.SetPosition(0, 0, 15)
   MeshFrame.SetOrientation(0, 0, 1, 0, 1, 0)
   MeshFrame.SetRotation(0, 0, 0, 0.05)     '-- Angle of rotation = 0.05

   DXScreen.CreateMeshBuilder(MeshBuilder)  '-- Create object

   MeshBuilder.Load("poly.x")               '-- Load your object
   MeshFrame.AddVisual(MeshBuilder)         '-- Add object to frame
END SUB

SUB DXTimerExpired
   DXScreen.ForceUpdate(0,0,50,50)   '-- Updates FPS Text
   DXScreen.Render
   DXScreen.TextOut(10,10,"FPS: "+STR$(DXTimer.FrameRate), &HFFFFFF, -1)
   DXScreen.Flip
END SUB
If everything worked, you should obtain some output that looks like
this: 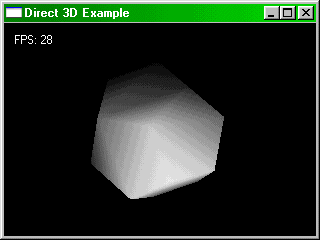
If you understood the example, it's quite easy to add more objects to the scene, just create another MeshFrame and load another object file. Play around with the code until you're satisfied.
' Wrap textures around 3D object

$TYPECHECK ON

CONST alClient = 5

'-- Light Types
CONST D3DRMLIGHT_AMBIENT = 0
CONST D3DRMLIGHT_POINT = 1
CONST D3DRMLIGHT_SPOT = 2
CONST D3DRMLIGHT_DIRECTIONAL = 3
CONST D3DRMLIGHT_PARALLELPOINT = 4

'-- Wrap Types
CONST D3DRMWRAP_FLAT = 0
CONST D3DRMWRAP_CYLINDER = 1
CONST D3DRMWRAP_SPHERE = 2
CONST D3DRMWRAP_CHROME = 3
CONST D3DRMWRAP_SHEET = 4
CONST D3DRMWRAP_BOX = 5

CONST WrapType = D3DRMWRAP_SPHERE     '-- You can modify this

DECLARE SUB DXInitialize(Sender AS QDXScreen)
DECLARE SUB DXTimerExpired

DIM DXTimer AS QDXTimer
    DXTimer.Enabled = 1
    DXTimer.Interval = 0
    DXTimer.Activeonly = 0
    DXTimer.OnTimer = DXTimerExpired

CREATE Form AS QForm
    Caption = "Direct 3D Example"
    Center
    CREATE DXScreen AS QDXScreen
        Init(320,240)
        Align = alClient
        Use3D = 1
        UseHardware = 0        '' This is for non-3D accelerated video cards.
                               '' 3D will be emulated using software, which
                               '' is much slower.
        OnInitialize = DXInitialize
    END CREATE
    ShowModal
END CREATE


SUB DXInitialize(Sender AS QDXScreen)
   DIM Light AS QD3DLight
   DIM LightFrame AS QD3DFrame, MeshFrame AS QD3DFrame
   DIM MeshBuilder AS QD3DMeshBuilder
   DIM Texture AS QD3DTexture
   DIM Wrap AS QD3DWrap
   DIM Mesh AS QD3DMesh


   DXScreen.CreateFrame(LightFrame)
   DXScreen.CreateFrame(MeshFrame)

   DXScreen.CreateLightRGB(D3DRMLIGHT_DIRECTIONAL, 0.9, 0.9, 0.9, Light)
   LightFrame.AddLight(Light)


   DXScreen.SetCameraPosition(-5, 10, 0)
   DXScreen.SetCameraOrientation(0.35, -0.65, 1.0, -0.15, 1.0, 0.5)

   MeshFrame.SetPosition(0, 0, 15)
   MeshFrame.SetOrientation(0, 0, 1, 0, 1, 0)
   MeshFrame.SetRotation(0, 0, 0, 0.05)       ' Angle of rotation = 0.05

   DXScreen.CreateMeshBuilder(MeshBuilder)

   MeshBuilder.Load("poly.x")            '-- Egg object

   MeshBuilder.LoadTexture("back.bmp")   '-- New lines
   MeshBuilder.CreateMesh(Mesh)

   MeshFrame.AddVisual(Mesh)

   DXScreen.CreateWrap(WrapType, 0,0,0, 0,0,1, 0,1,0, 0,0, 1,1, Wrap)
   Wrap.Apply(Mesh)

END SUB

SUB DXTimerExpired
   DXScreen.ForceUpdate(0,0,50,50)
   DXScreen.Render
   DXScreen.TextOut(10,10,"FPS: "+STR$(DXTimer.FrameRate), &HFFFFFF, -1)
   DXScreen.Flip
END SUB
Again, if everything worked, you should obtain some output that looks
like this (depending on what texture file you used of course):
As you can see, it doesn't take much to add textures to our objects. The only problem is you lose a few frame rates by doing this.
   DXScreen.ForceUpdate(0,0,50,50)
   DXScreen.Move(1)            '-- Add this line
   DXScreen.Render
This moves the camera position by the amount specified. The affect is a rotation about angle Theta. This Theta was specified on the line:
MeshFrame.SetRotation(0, 0, 0, 0.05) ' Angle of rotation = 0.05DXScreen.Move animates the entire scene, to just animate a certain frame, you can use MeshFrame.Move(1).
| Prev Chapter | Contents | Next Chapter |